We have already talked about Flutter and how it has become one of the most powerful frameworks for building applications with a single codebase. However, its capabilities go beyond mobile and web development, enabling the creation of cross-platform desktop applications. With Flutter, we can develop for Linux, Mac, and Windows, using the same tools and paradigms we already know, without needing to learn additional technologies specific to each platform.
Desktop application development has often been a challenge for developers who want to provide a uniform experience across multiple operating systems. Traditionally, this required learning various tools and programming languages depending on the platform: C# for Windows, Objective-C or Swift for macOS, and Linux-based languages for other environments. Flutter removes this complexity by offering a single solution for all these platforms, using **Dart ** as the central language and providing a rich ecosystem of widgets and tools.
Flutter’s graphics engine, Skia, allows us to create highly customizable and fluid user interfaces, regardless of the platform on which the application is running. This ensures that our applications maintain the same visual quality and performance on any operating system, whether on a mobile device or desktop.
Another key aspect is the ability for rapid prototyping. Just like in its mobile and web versions, Flutter for desktop allows developers to see changes in real-time thanks to the Hot Reload feature. This facilitates quick iterations and enhances the development experience, especially in the early stages of an application’s lifecycle.
In this article, we will not only see how Flutter enables us to develop desktop applications but also explore how to choose the right libraries and what considerations to keep in mind when integrating specific functionalities through external packages. Then, we will put this knowledge into practice with a real-world example of an application that tracks the price evolution of various cryptocurrencies.
Pub Dev and Flutter
When developing applications with Flutter, one of the most important sources of resources is Pub Dev, the official package repository for the Dart and Flutter ecosystem. Here, we find libraries and additional tools that help us implement functionalities in our applications, ranging from state management to graphics, local databases, and much more. However, when working with multiple platforms such as mobile, web, and desktop, it is crucial to understand the key details of each library before integrating it into our project.
What to consider when choosing a package on Pub Dev?
When browsing Pub Dev, there are several factors to consider to ensure that the selected package is suitable for our application and compatible with the target platforms.
1. Platform Compatibility
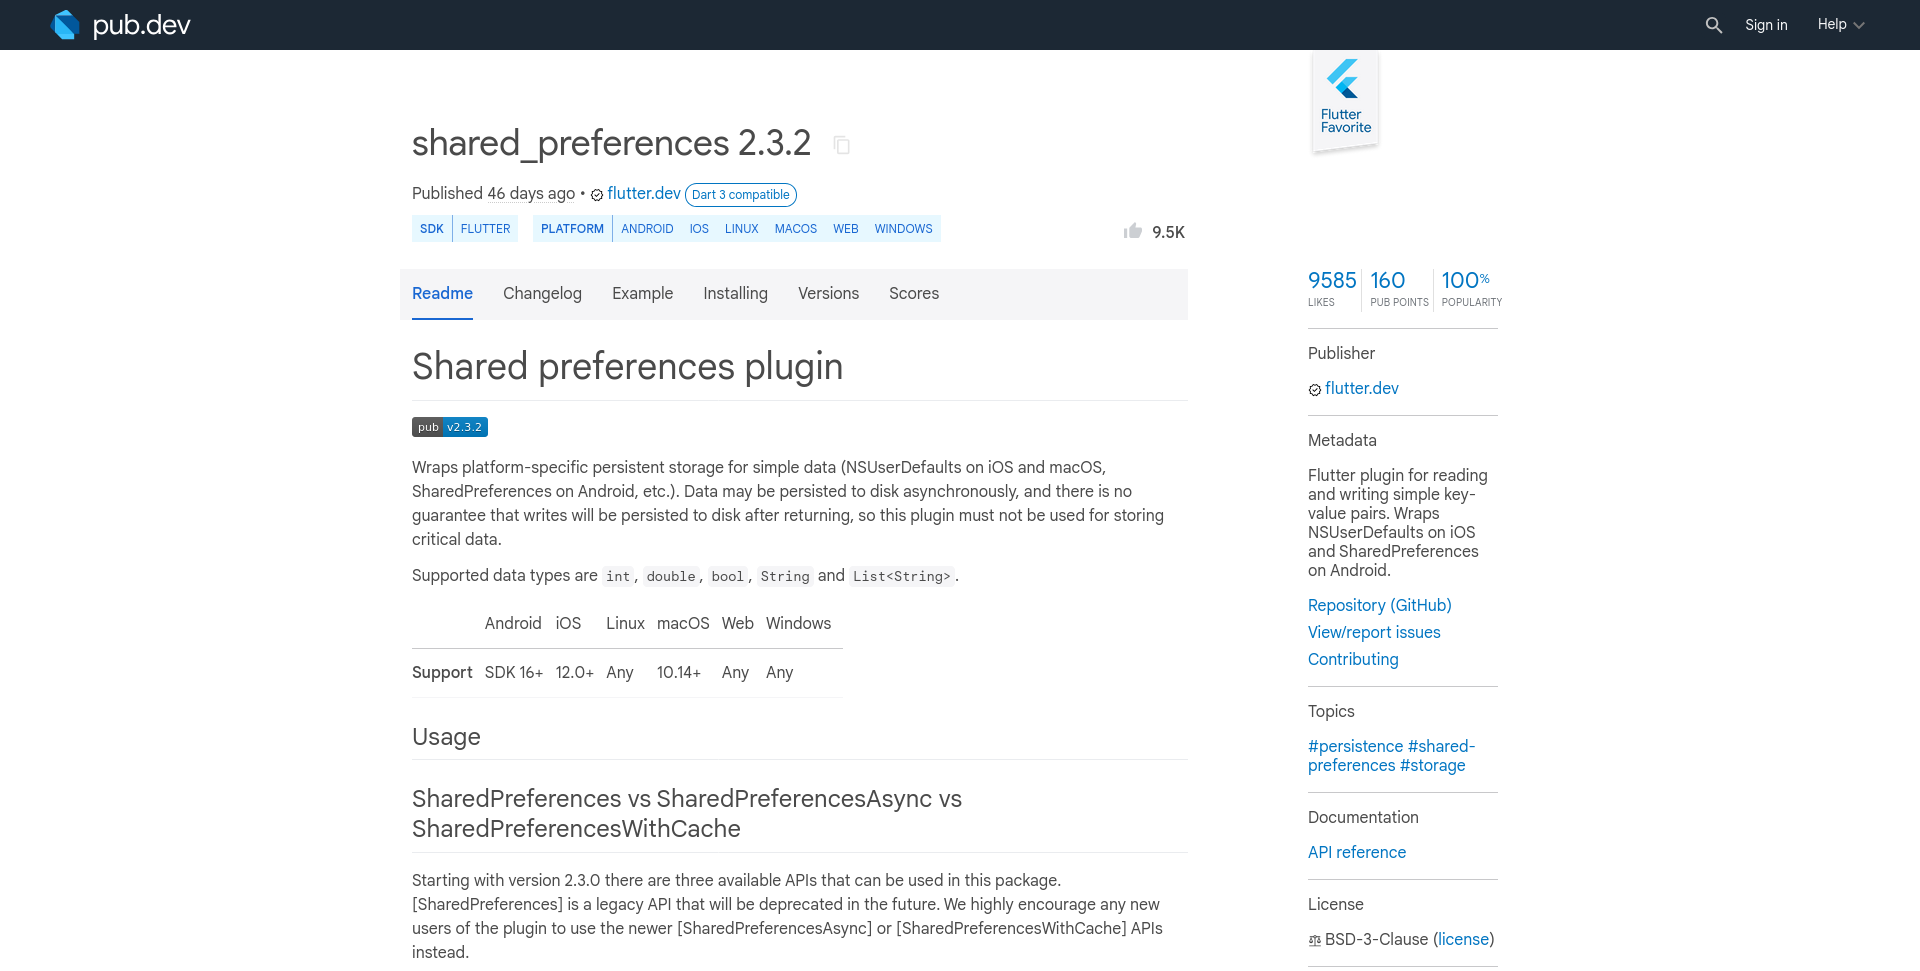
One of the most important details when selecting a package is ensuring that it is compatible with the platforms where we want our application to run. Pub Dev offers a specific section in each package, below the name, that clearly indicates for which environments the package has been designed. We must ensure that the package supports:
- Android and iOS for mobile applications.
- Web for applications that run in browsers.
- Linux, macOS, and Windows for desktop applications.
This information saves us time and avoids errors when selecting a library that does not work on all the platforms where we plan to deploy our application.
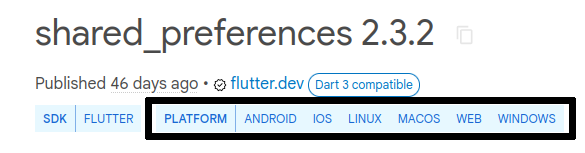
2. Package Version
Another fundamental aspect is the version of the package we are integrating. On Pub Dev, the versions are clearly
marked, and we must ensure that we are using the latest stable version. Versions usually follow the semantic versioning
standard (x.y.z), where:
- x is the major version: indicates significant or incompatible changes with previous versions.
- y is the minor version: introduces new features but remains compatible with previous versions.
- z are the patches or bug fixes.
We must be cautious with major versions, as they can imply important changes in the package API and may require modifications in our code.
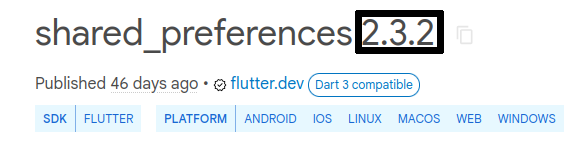
3. Support for Flutter 3
Flutter version 3 introduces significant improvements in performance and application stability, along with new features and optimizations. When choosing a package, it is important to ensure that it is compatible with Dart version 3, as this guarantees that we will be able to take full advantage of the latest features in Flutter. On Pub Dev, we can see if a package is compatible with Dart 3 right next to its name.
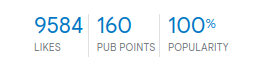
4. Health and Popularity Scores
Pub Dev also assigns scores to packages based on various factors such as popularity, health, and maintenance. These scores help us identify reliable and well-maintained packages by the community. A package with a high popularity score is likely used by many developers and has an active community that quickly reports and solves issues.
Choosing packages with good scores and active maintenance can save us many headaches in the future, as they are more likely to be regularly updated and compatible with future versions of Flutter.
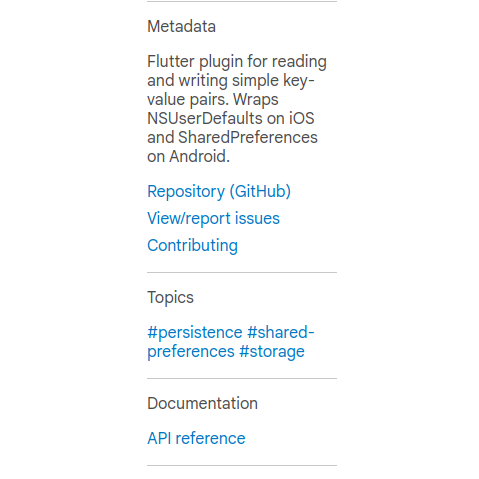
5. Documentation and Examples
Finally, before choosing a package, it’s advisable to review the documentation and examples provided. Good documentation is crucial for integrating a package efficiently, and the examples allow us to quickly see how to implement the functionalities that the package offers. Additionally, it is useful to check if the package has a GitHub repository where issues can be reported or suggestions for improvements can be made.
For our example, we will use the following Pub Dev packages:
- fl_chart: Used to display interactive charts.
- http: Allows making HTTP requests to fetch data from an external API in our case.
- shared_preferences: For storing data locally in the application, such as selected cryptocurrency preferences.
- intl: Provides tools for formatting dates and numbers in different international formats.
All of these are compatible with Flutter Desktop and provide the necessary tools to create an application that meets the specified requirements. In this practical example, we will build a price evolution viewer for various cryptocurrencies.
Practical Example: Cryptocurrency Price Evolution
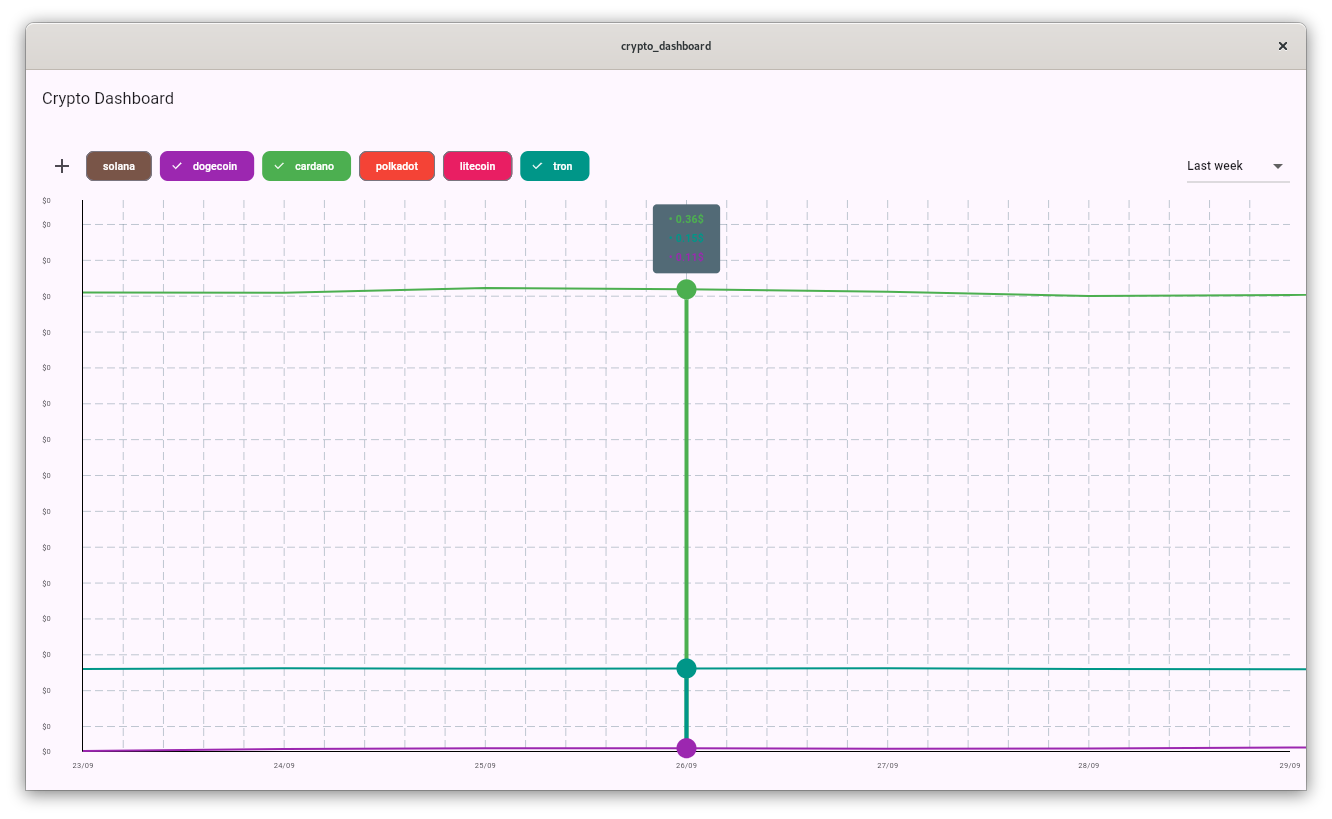
Now that we’ve explored how to identify the most suitable libraries for our project on Pub Dev, let’s dive into our practical example. We will build a cryptocurrency price evolution viewer with a simple and clear interface. The application will allow users to select the cryptocurrencies they wish to view and will display an interactive chart with the prices of the digital currencies over a selected, modifiable time period.
Project Features
Before diving into the code, let’s briefly review the project interface. Our application will consist of:
- Price visualization chart for the cryptocurrencies selected by the user.
- Cryptocurrency selection via a dialog that allows choosing from predefined options.
- Time period control to display prices within a selected time range, with options for 1 week, 15 days, 1 month, or 3 months.
- Interaction with an external API to fetch the latest cryptocurrency data.
Source Code
Next, we will go over some of the most important parts of the source code used to build this application. You can find the complete code in our GitHub repository.
1. Interactive Evolution Chart
One of the key components of this application is the visualization of the data retrieved from the API. To graphically display the values of the selected cryptocurrencies, we use the fl_chart package. This package allows us to create interactive and highly customizable charts.
  Widget _buildLineChart() {
    DateTime today = DateTime.now();
    int daysInPeriod = int.parse(_selectedPeriod);
    DateTime startDate = today.subtract(Duration(days: daysInPeriod));

    return LineChart(
      LineChartData(
        maxX: daysInPeriod.toDouble() - 1,
        borderData: FlBorderData(
          show: true,
          border: Border(
            left: BorderSide(color: Colors.black),
            bottom: BorderSide(color: Colors.black),
            top: BorderSide.none,
            right: BorderSide.none,
          ),
        ),
        titlesData: FlTitlesData(
          show: true,
          bottomTitles: AxisTitles(
            sideTitles: SideTitles(
              showTitles: true,
              reservedSize: 22,
              interval: 1,
              getTitlesWidget: (value, meta) {
                DateTime date = startDate.add(Duration(days: value.toInt()));
                return SideTitleWidget(
                  axisSide: meta.axisSide,
                  child: Text(
                    DateFormat('dd/MM').format(date),
                    style: TextStyle(fontSize: 10),
                  ),
                );
              },
            ),
          ),
          leftTitles: AxisTitles(
            sideTitles: SideTitles(
              reservedSize: 40,
              showTitles: true,
              getTitlesWidget: (value, meta) {
                return Text('\$${value.toInt()}',
                    style: TextStyle(fontSize: 10));
              },
            ),
          ),
        ),
        lineBarsData: _cryptoPrices.entries.map((entry) {
          return LineChartBarData(
            spots: entry.value.asMap().entries.map((e) {
              return FlSpot(e.key.toDouble(), e.value);
            }).toList(),
            isCurved: true,
            color: _cryptoList[entry.key],
            barWidth: 2,
            dotData: FlDotData(show: false),
          );
        }).toList(),
      ),
    );
  }
Here, we have created a line chart that displays cryptocurrency values over a period of time selected by the user. We use the LineChart class from fl_chart to configure the data and appearance of the chart, including axes, titles, and line colors.
2. Cryptocurrency Selection
To allow the user to choose which cryptocurrencies to display, we use a pop-up dialog that presents a list of options. To implement this feature, we created a custom dialog with a stateless widget that uses an AlertDialog, showing a list of predefined cryptocurrency options. If you need a refresher on how states work in Flutter, you can check out our article on Widgets, the cornerstone of Flutter.
  class SelectCryptoDialog extends StatelessWidget {
    final Map<String, Color> cryptoList;
    final Map<String, bool> selectedCryptos;
    final Function(String, bool) onSelected;

    const SelectCryptoDialog({
      required this.cryptoList,
      required this.selectedCryptos,
      required this.onSelected,
    });

    @override
    Widget build(BuildContext context) {
      return AlertDialog(
        title: Text('Select Cryptocurrencies'),
        content: SingleChildScrollView(
          child: StatefulBuilder( // Asegura que el estado se actualice correctamente dentro del diálogo
            builder: (BuildContext context, StateSetter setState) {
              return Column(
                mainAxisSize: MainAxisSize.min,
                children: cryptoList.keys.map((crypto) {
                  return CheckboxListTile(
                    title: Text(crypto),
                    value: selectedCryptos[crypto],
                    activeColor: cryptoList[crypto],
                    onChanged: (bool? selected) {
                      setState(() {
                        onSelected(crypto, selected!); // Actualizar selección
                      });
                    },
                  );
                }).toList(),
              );
            },
          ),
        ),
        actions: [
          TextButton(
            child: Text('Close'),
            onPressed: () {
              Navigator.of(context).pop();
            },
          ),
        ],
      );
    }
  }
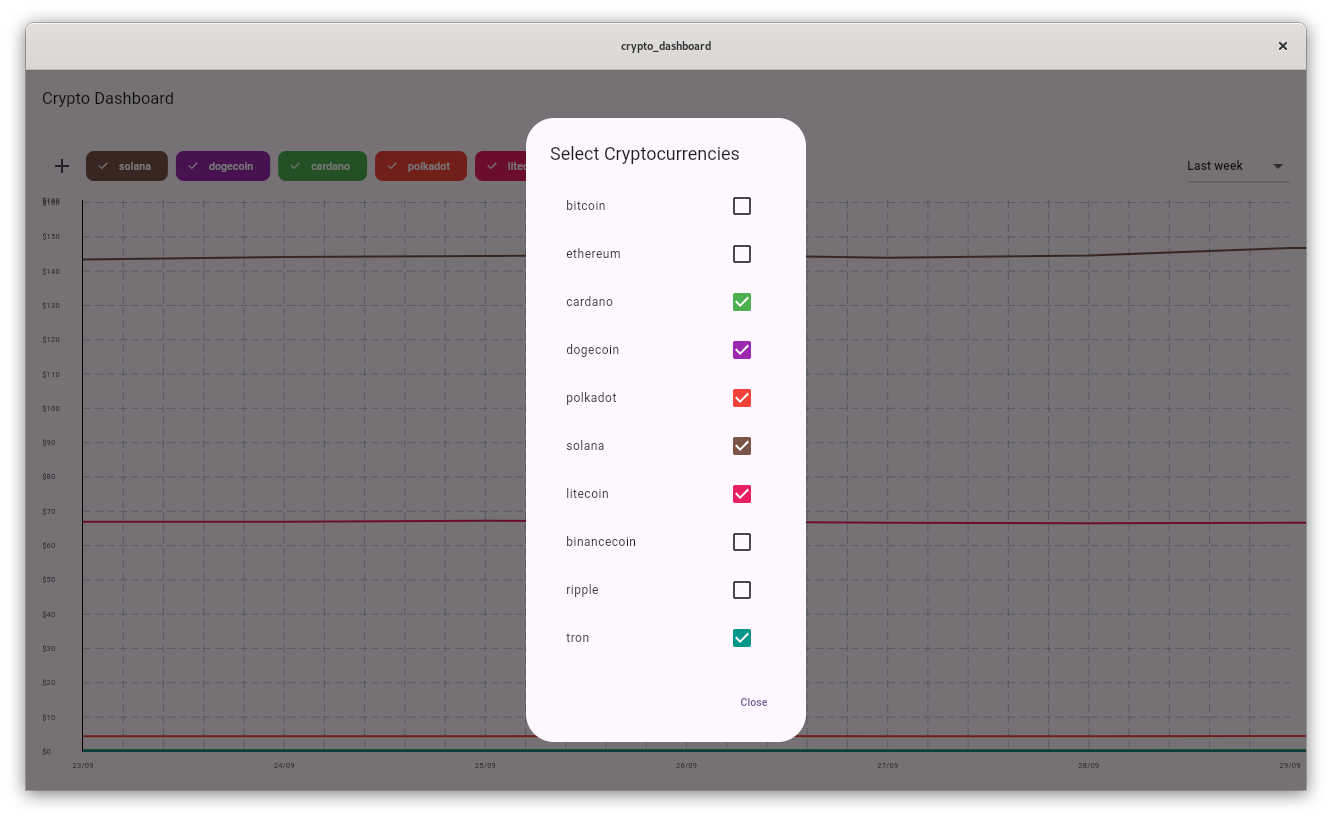
In this code snippet, we create a pop-up dialog that shows a list of cryptocurrency options. We use an AlertDialog to display the options and allow the user to select or deselect the desired cryptocurrencies. These cryptocurrencies will be displayed in the price evolution chart and can be shown or hidden using the visibility controls.

3. Interaction with an External API
To retrieve the cryptocurrency data, we use an external API that provides updated information on the values of digital currencies. In this case, we use the CoinGecko API to get the prices of the selected cryptocurrencies.
  Future<List<double>> getCryptoPrices(String coinId, String days) async {
    try {
      final url = Uri.parse('$baseUrl/coins/$coinId/market_chart?vs_currency=usd&days=$days');
      final response = await http.get(url);

      if (response.statusCode == 200) {
        final data = json.decode(response.body);
        List<double> prices = List<double>.from(data['prices'].map((priceData) => priceData[1]));
        return prices;
      } else {
        throw Exception('Failed to load data: ${response.statusCode}');
      }
    } catch (e) {
      throw Exception('Error fetching data: $e');
    }
  }
In this code snippet, we make an HTTP request to the CoinGecko API to get the prices of the specified cryptocurrency. Using the http library, we send the request, and jsonDecode handles the JSON response. Once we retrieve the data, we update the application’s state with the cryptocurrency prices.
Compiling the code is as simple as running flutter run -d windows for Windows, flutter run -d macos for Mac, or flutter run -d linux for Linux. Flutter Desktop will take care of compiling the application for the specified platform and generating the executable to distribute the application.
I invite you to try and play around with the app. You can find the complete source code in our GitHub repository and continue exploring the possibilities of Flutter Desktop. You could add more features like displaying the current price of cryptocurrencies, a chart showing hourly changes or shorter periods, or even implement a notification system for significant price changes. You could also improve the app’s design to make it more visually appealing, as it currently uses Flutter’s default configuration. There are many features and improvements you can add to this project.
Conclusion
In this article, we’ve explored how Flutter can be used to create cross-platform desktop applications, along with a guide on how to choose compatible packages for your project. We’ve seen how to identify the most suitable libraries on Pub Dev and applied that knowledge in a practical example with a cryptocurrency price evolution viewer.
Flutter Desktop offers a powerful and unified solution for desktop application development, allowing us to create consistent user experiences across multiple operating systems. With the growing popularity of Flutter and its rich ecosystem of packages, now is the perfect time to explore the possibilities this technology offers for modern cross-platform application development. Happy Coding!